Start with the first app launch, complete setup, submit your application, and see how Account changes after approval.
11 clear steps
Every first-run screen included
Application reviewed personally
1
On first launch, four short screens explain how Spintip records, reviews, shares, and analyzes a game. Swipe through them to understand the product, or tap Skip to go directly to sign-in.
Your choice: swipe to continue or tap Skip. Skipping does not disable any feature.


2
Tap Sign in with Apple and follow Apple’s prompts to create or access your Spintip account securely.
Tap: Sign in with Apple
3
Connect with a coach or parent if either applies to you. You can also tap Skip for now and add connections later from Account.
Choose: Connect with Coach, Connect with Parent, or Skip for now


4
Spintip asks for Camera, Microphone, and Notification access. Camera access is required to record and analyze your future games. Microphone access is required when you want to record feedback or add voice comments to a video.
Required to record games, detect highlights, analyze play, and scan QR codes.
Not required for basic use, but required to record feedback and add voice comments to your videos.
Optional. Allow them if you want alerts about feedback and account activity.
Important: Allow Camera to record games. Allow Microphone when you want to record feedback or leave voice comments on videos.
You can change Microphone and Notification access later in iOS Settings.
5
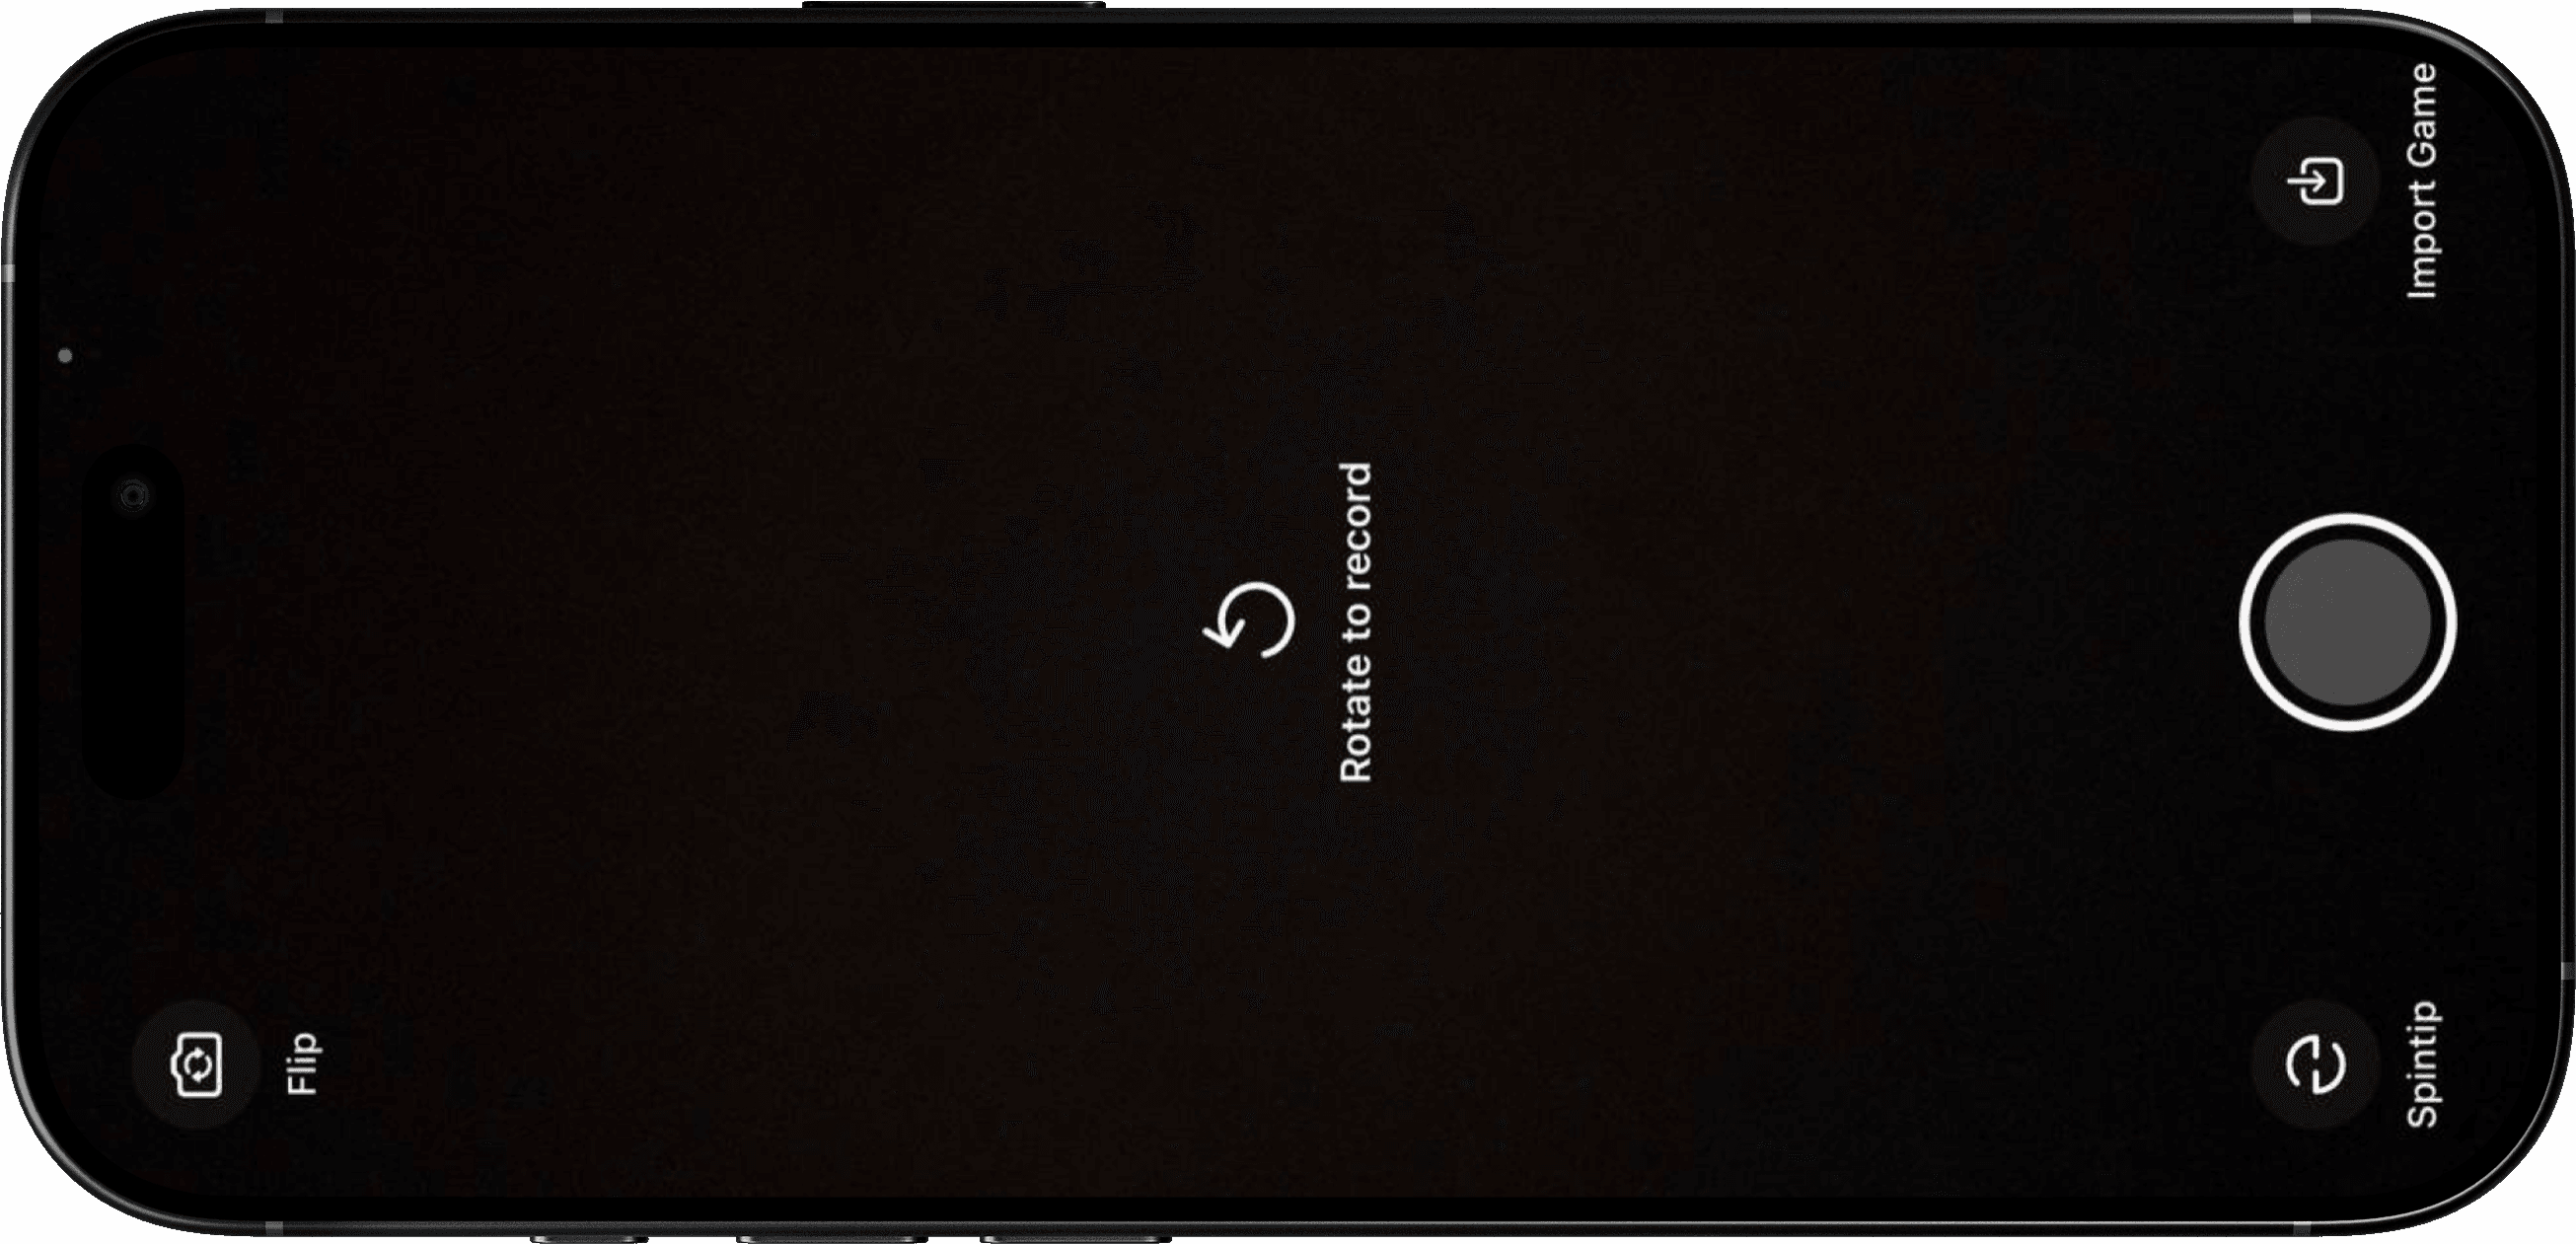
After permissions, Spintip may open the recording screen and show Rotate to record. You are not recording a game during this setup, so you do not need to rotate the phone or press the record button.
To continue: tap the Spintip button on the right side of the screen
This takes you into the main application so you can continue to Account without getting stuck on the recording screen.

6
To apply: tap Account in the bottom-right corner
7
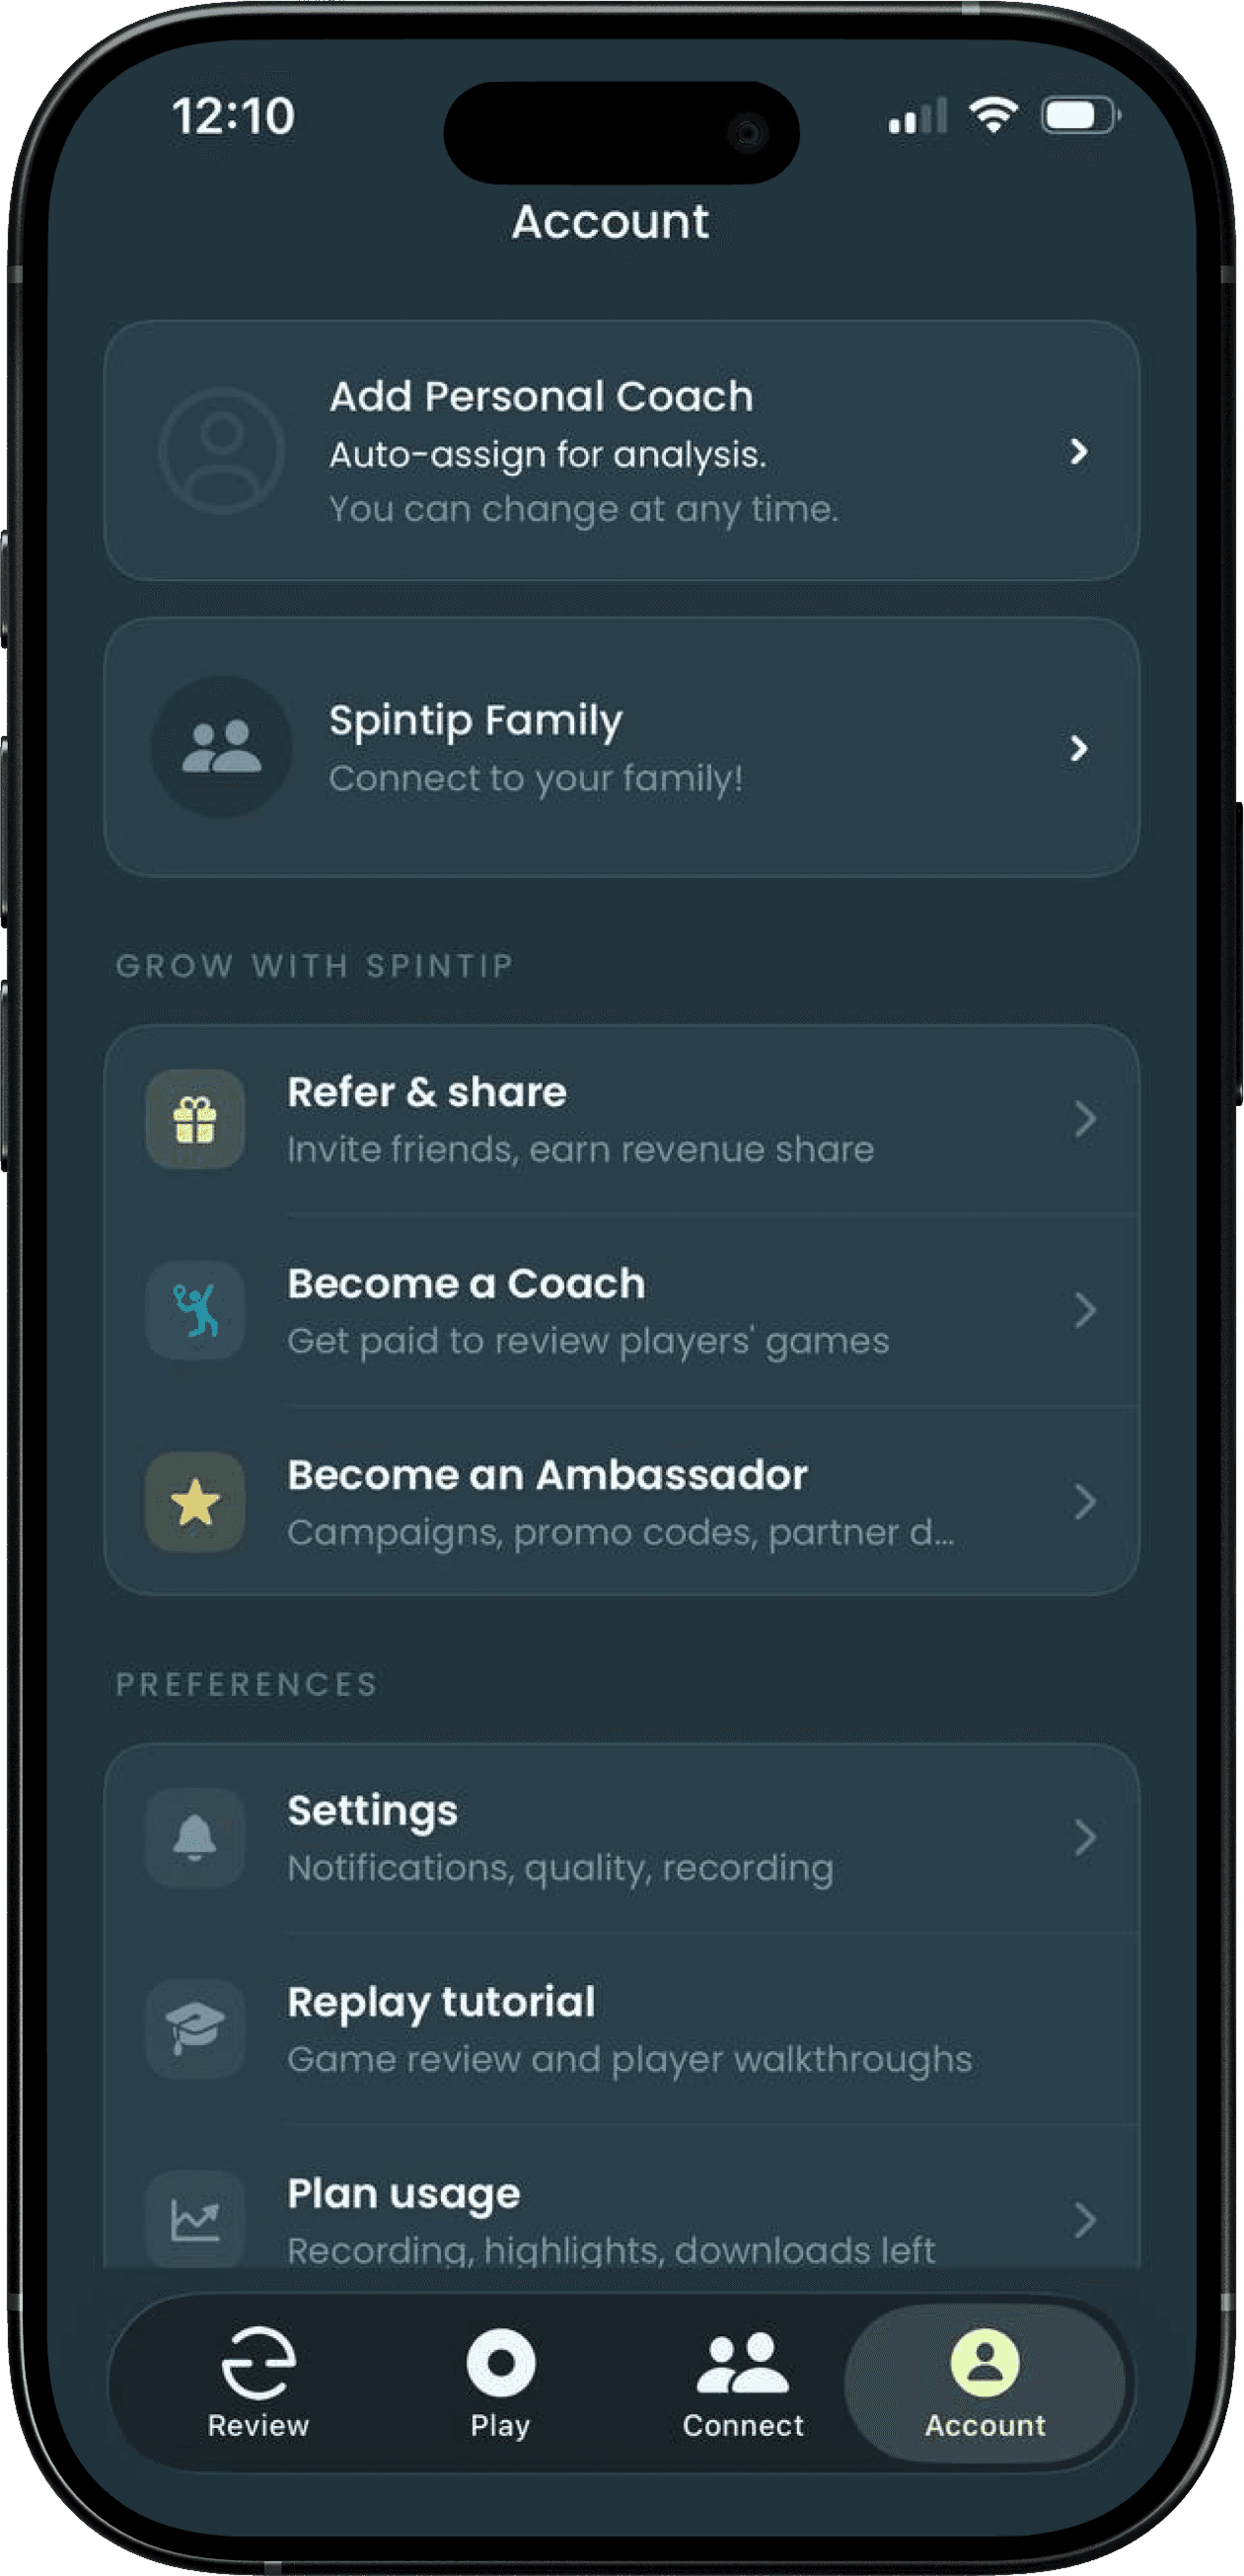
Account contains membership, connection, referral, coaching, and partner options. The example shown uses fictional demo information.
Tap: Account, then scroll down

8
Under Grow with Spintip, tap Become an Ambassador to open the partner-program overview.
Path: Account → Grow with Spintip → Become an Ambassador
9
Read how ambassadors participate, the opportunities shown by Spintip, what the company asks in return, and the four-step operating process. Scroll through the entire page before applying.
Review: referrals, revenue share, community representation, testimonials, content, tracking, and payouts


10
Tap Apply to become an ambassador. A successful submission displays a confirmation and changes the button to Application submitted.
Confirmation: “Your application is in - we’ll reach out with next steps.”
11
Submission and approval are different states. After Spintip approves your application, your Account displays a gold Ambassador badge beside the Player badge. Your subscription changes from Spintip Beginner to Spintip PRO, which means all Spintip functions are available without usage limits. The application entry is also replaced by Refer & promote tools.
Approved-state signs: Ambassador badge · Spintip PRO · unlimited functions · Refer & promote

Application complete
Spintip reviews your application and contacts you with the next steps if there is a fit. Approved ambassadors receive the tools required to represent and refer their community.
01 · Review
The Spintip team reviews your application.
02 · Personal follow-up
You are contacted about fit and next steps.
03 · Setup
Approved partners receive their profile, codes, link, and QR.
Program availability, terms, percentages, eligibility, and benefits may change. Confirm current terms with Spintip before relying on them.